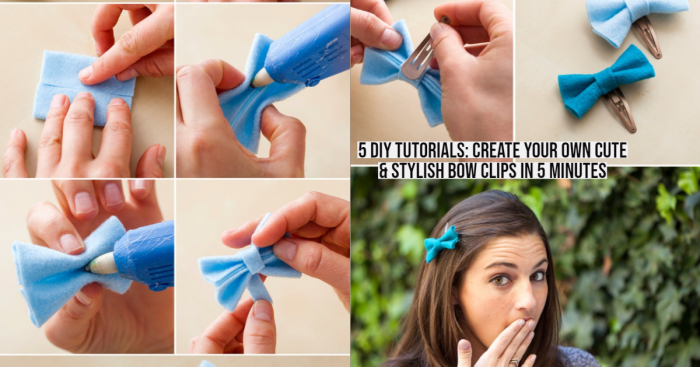
5 DIY Tutorials: Create Your Own Cute & Stylish Bow Clips in 5 Minutes
Hair accessories not only add style but also class to your look. Yes, and bows are one of them. Try making them with your own hands. Yes, check these hair bow styles and make any you like.
Hair bows are not only fun accessories but can truly add style and class to your overall outfit. And guess what, along with style, it also offers a touch of innocence to the look.
Plus, despite what age you are or what length your hair has, bows can be worn surely. However, you might want a hair bow that matches your outfit for the occasion or is themed for a certain event, but it can't be easy to find the design you are looking for in the store.
So, why not DIY (Do It Yourself)? Yes, you read it right! Gather some materials, feel the creativity, and make your very own bow. Still, confused about how to start? Well, here we are with five easy and fun hair bow ideas.
So, all you need to do is choose which one you want to make and follow the steps. Let’s begin!
1. Sparkly Little Hair Bows
Start with a square size fabric of dimensions 4″ x 4″. Then you can use spray starch to press it well, especially if you’d like extra crispness.
Bringing the top down to the bottom, fold it in half, right sides together.
Now, leaving a 1/2″ opening in the bottom center and following the stitch lines in the picture below, stitch using a 1/4″ seam. And where there is a fold no need to stitch across the top.
Also, without clipping through your stitching, clip the corners. And, next through the opening, turn the rectangle right side out. Then to push out each corner as best, you can use a bluntly pointed object. Plus, press very well again.
Now, the piece is ready to fold the top and bottom-up toward the center in a pinching way.
Fold back the top and bottom edge to meet the fold line on the back while still holding the folded fabric in place. In this way, you will see your bow form.
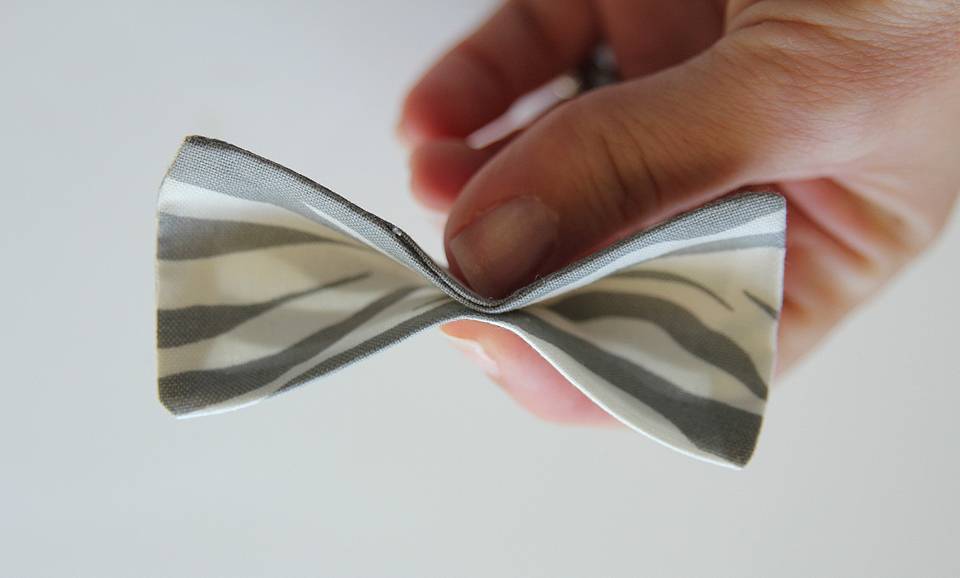
Now, stitch a quick zig-zag stitch at the center along the “sides” of the bow's middle by laying the bow on its side in your sewing machine.
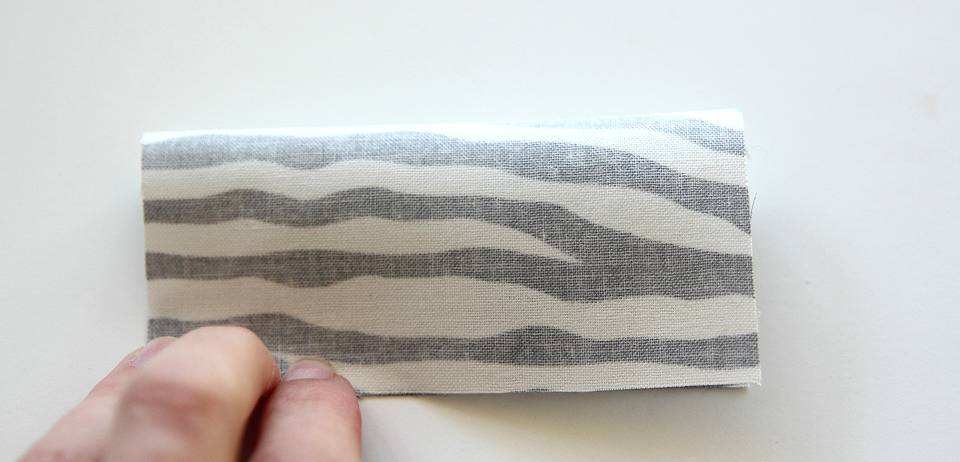
After all such steps, you need to cut another scrap of fabric 4″ tall x 2″ wide. Now, along the length, fold in half and press.
Fold each side into the center mark by opening the piece up again and press.
Now to make a strip of double-fold bias-like tape, fold the whole thing in half again on your first fold mark. Further, stitch along the edge down each side of the strip.
Then, overlapping slightly, wrap the strap around the center of the bow piece. Afterward, cut off the excess part of the strip and also implement a fray check on it if you’d like to prevent the edges from fraying. Then allow drying for a few minutes.
Now, use a hot glue gun around the bow to join the ends of the strip.
Last but not least, grab a clip of your choice and slide it through the back of the center loop on the bow. Now, to secure the bow to the clip, add dabs of hot glue between the bow and the clip top. However, as an alternate process, you can also glue the bow onto the clip before wrapping the center strip around. Later, wrap and glue the center strip around the bow and clip at once.
So, the final bow will look like this:

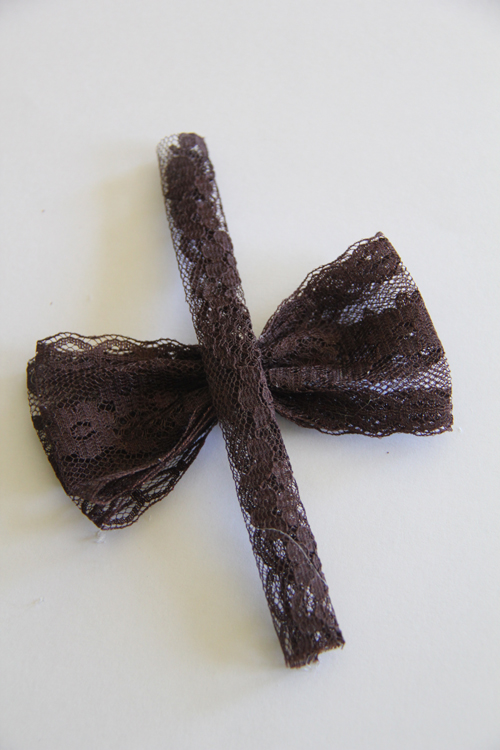
2. Lace Hair Bow
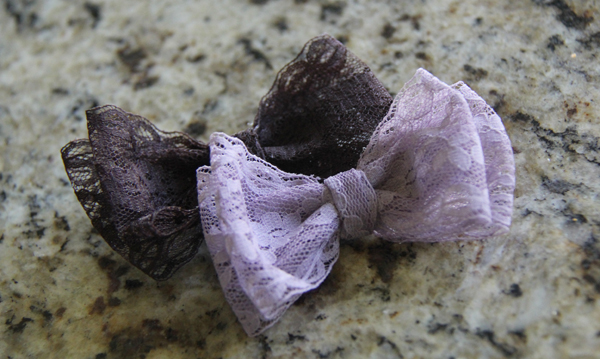
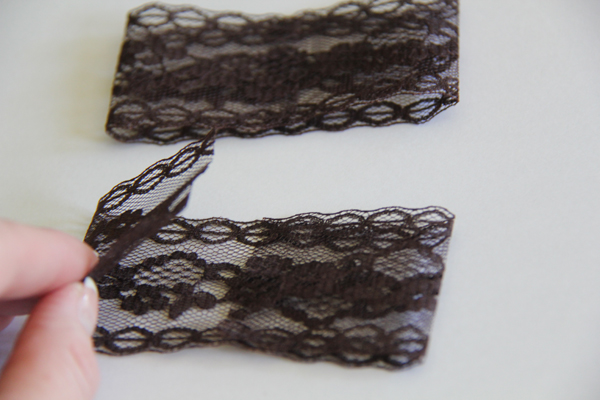
To make Lace Hair Bow, all you need is lace, a clip, and a hot glue gun. Yes, and don't worry, these are so simple and cheap to make. You can use any flat lace. Start by cutting three pieces. Out of them, one-piece will be 4″ long, and the other two pieces will be 7″ long.
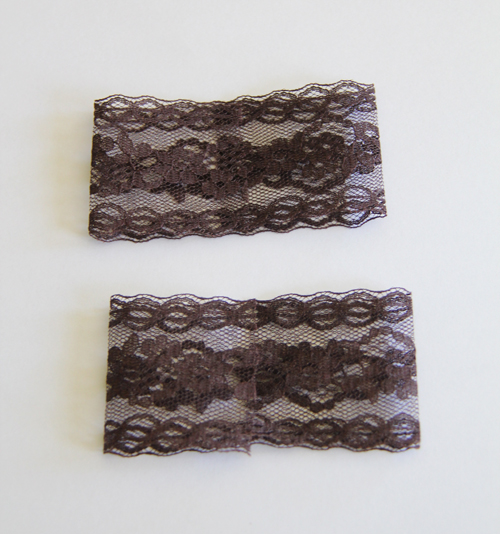
Now fold your 7″ pieces to the center like below image:
Further, you need to hold the folds in place with a little bit of hot glue in the middle to paste them. So they will look like this:
Now make a roll of 4″ piece and to hold the folds, put a few dabs of hot glue on it.
Now, place both 7″ pieces on top of each other, and use your fingers to fold them like an accordion. Next, you can use a bit of hot glue on the middle part too to help hold it in place. It will make it easier to stay together.
Afterward, place a small drop of hot glue on top of your bow and attach your 4″ folded piece like below image:
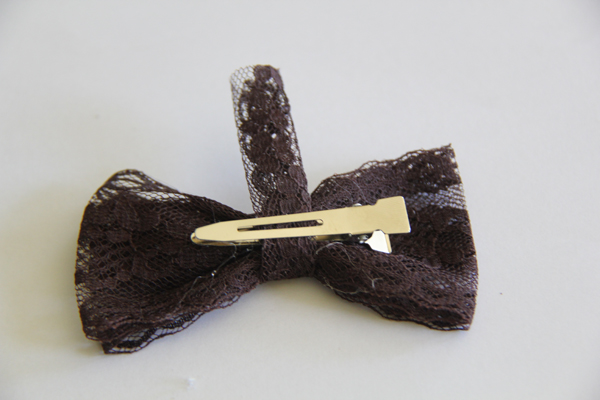
Now use alligator clips for the clip part. And, open hot glue the top of your clip to the bottom of your bow while holding your clip.
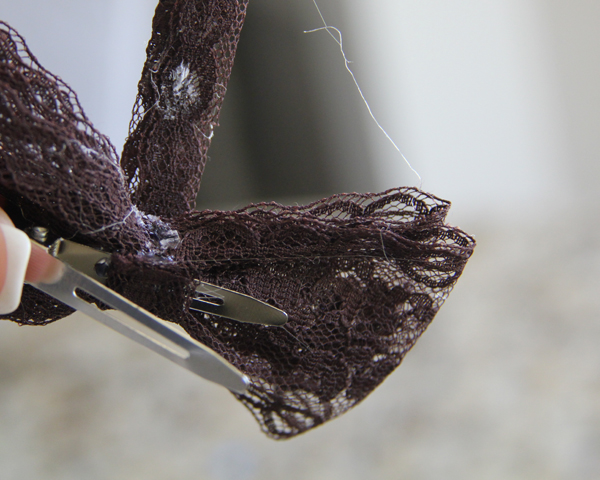
After cutting the excess off the long piece, wrap it around and attach it to the glue. So, it will look like this:
Now just cut your excess off and guess what- it's ready!
3. Rounded End Five Petal Flower Bow
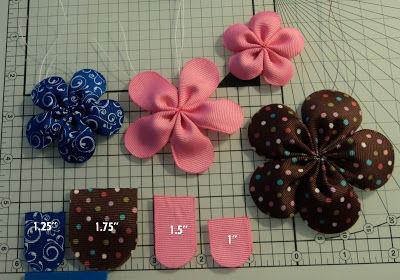
Things you need to make this flower are 1 1/2 inch Ribbon, Woodburner, 1 1/2 inch Metal Washer, Upholstery thread, and Needle.
At first, use a washer and wood burning tool to make a rounded ribbon edge. Start by tracing the end of the washer on the ribbon. In this way, you can cut the ribbon and seal the end at the same time.
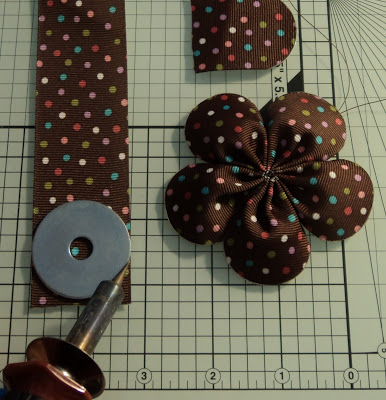
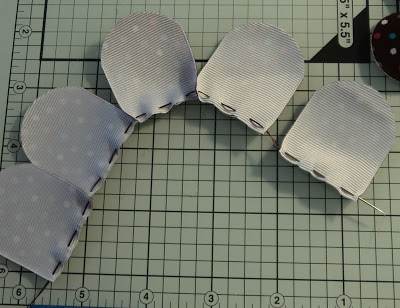
Now you need to cut Ribbon in petal shape, and all these petals are 1 3/4 inches. Now repeat the same process to make five petals.
Stitch petals together with the upholstery thread and needle, as shown in the below image.
Then, pull the threads tight and tie off on the back of the flower. At last, you can paste any small clips at the back to use it as a hair clip.
4. The Twisted Boutique Bow
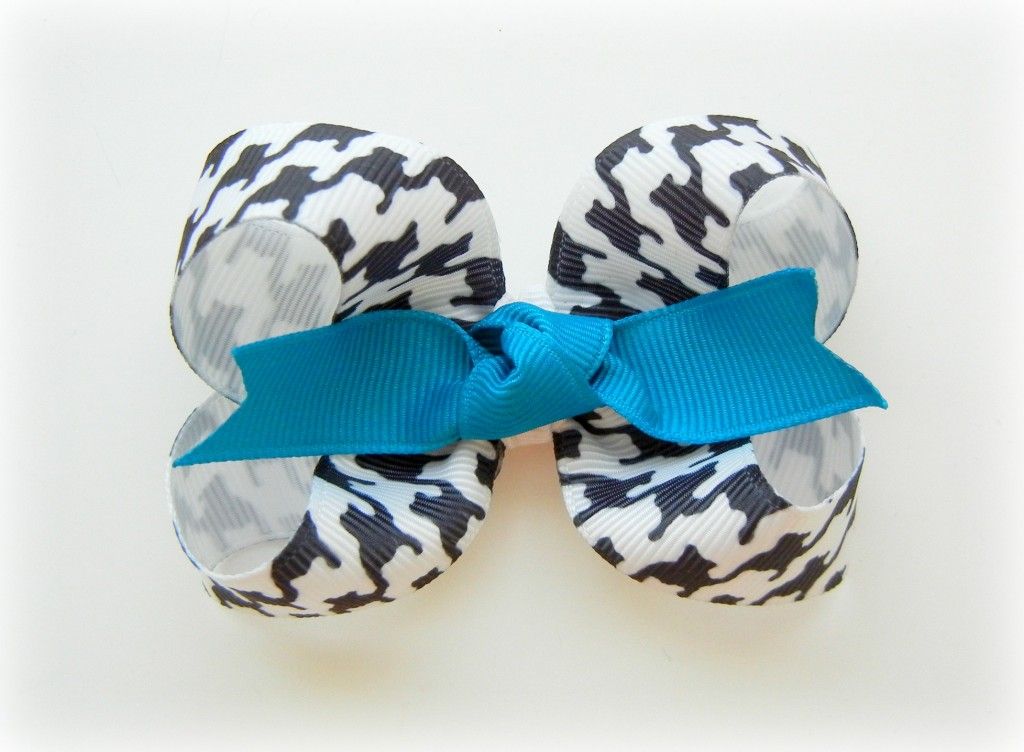
Well, this one is a little difficult bow, especially for those who are a novice in bow making; however, still, if you won't make it, follow the instructions. All you need is ribbon, a thread, and a needle. And, to finish it off, you will need a clip, a hot glue gun, and a matching ribbon.
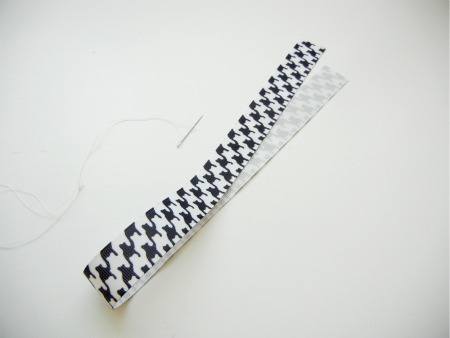
You can choose the size of your bow. So if you want a 3″ bow, you need to cut 18″ of ribbon.
Start by cutting your ribbon and seal the ends. Now, get your thread and needle ready.
Then make a knot on end by doubling your thread.
Afterward, fold your ribbon in half and mark the center. Next, you need to lay your ribbon vertical and bring the top of the ribbon down and turn it, so the right side is facing down.
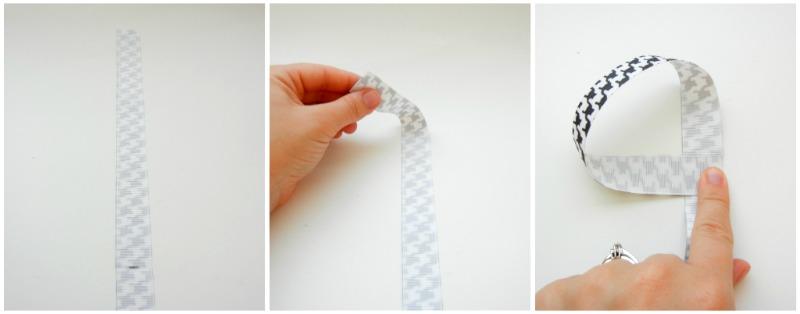
Now repeat the same steps with the other end of the ribbon.
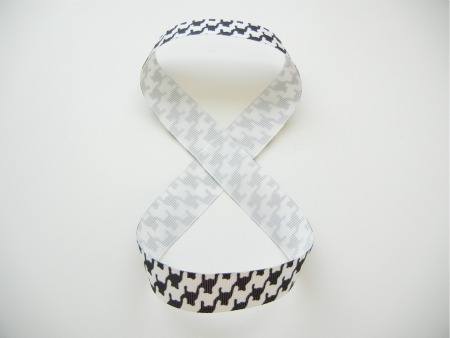
Either you can use ribbon adhesive or do the same thing just by putting adhesive on the ends of the ribbon. Only make sure that both loops are even.
Further, take the middle part of the top loop and bring it to the center.
And repeat the process with the other loop. So it will look like this.
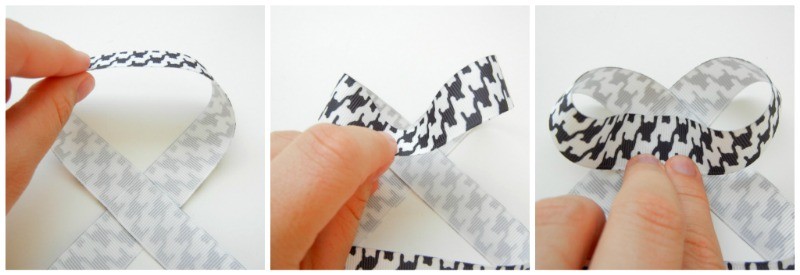
Next, to secure the bow, use the thread and needle. Just keep in mind that when you tighten the thread, build an accordion-style crease in the middle of the bow.

While doing that, make sure to go around 1 – 2 more times to tighten the thread. Also, to secure the thread, take a couple of stitches in the back.
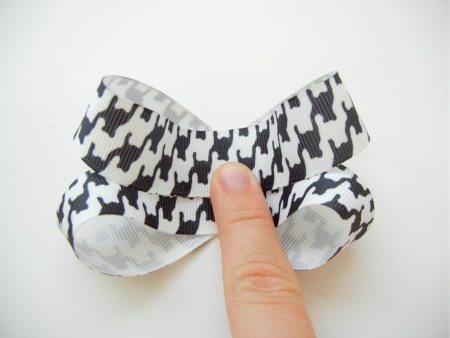
Now is the time you need to attach the clip. Yes, your bow is ready now to be attached to a clip. For that, you can either use hot glue or try sewing the clip to the bow. You can use any color ribbon or any type bow that too of any size. Make one and enjoy flaunting it.
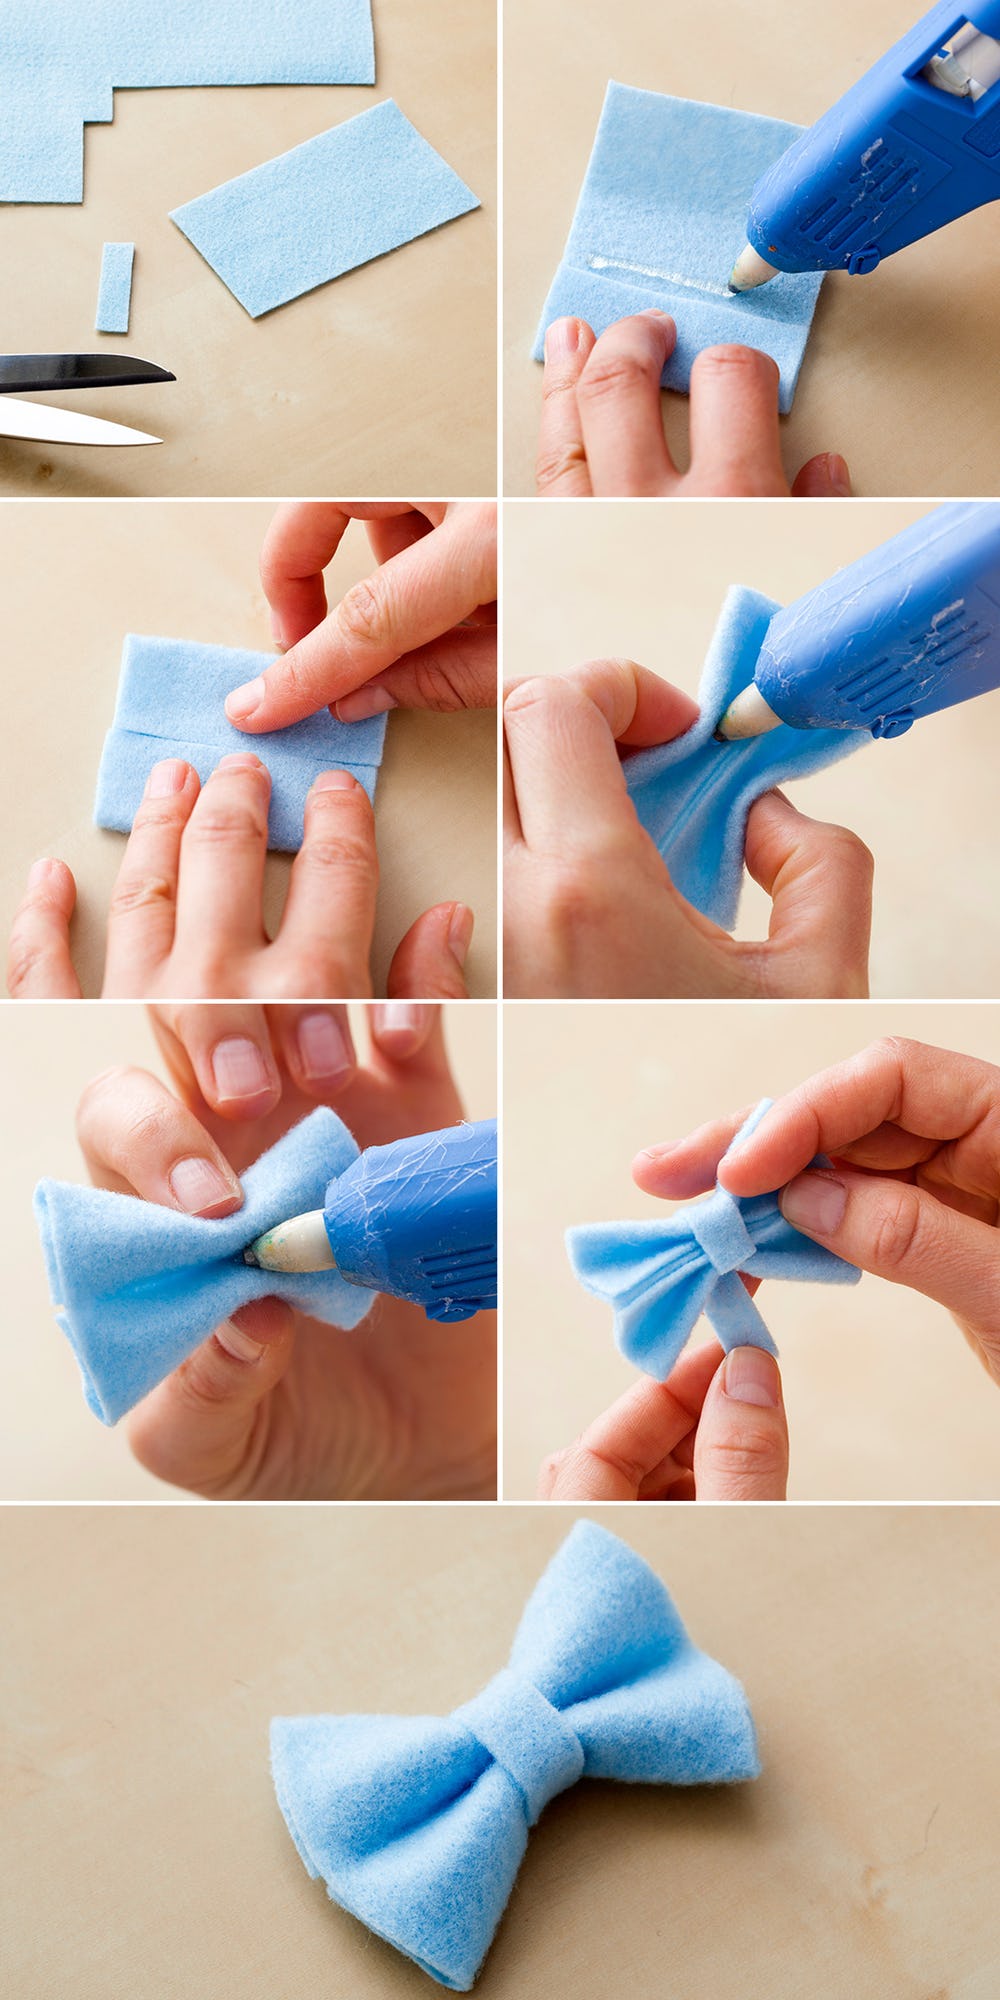
5. Cute Felt Bows
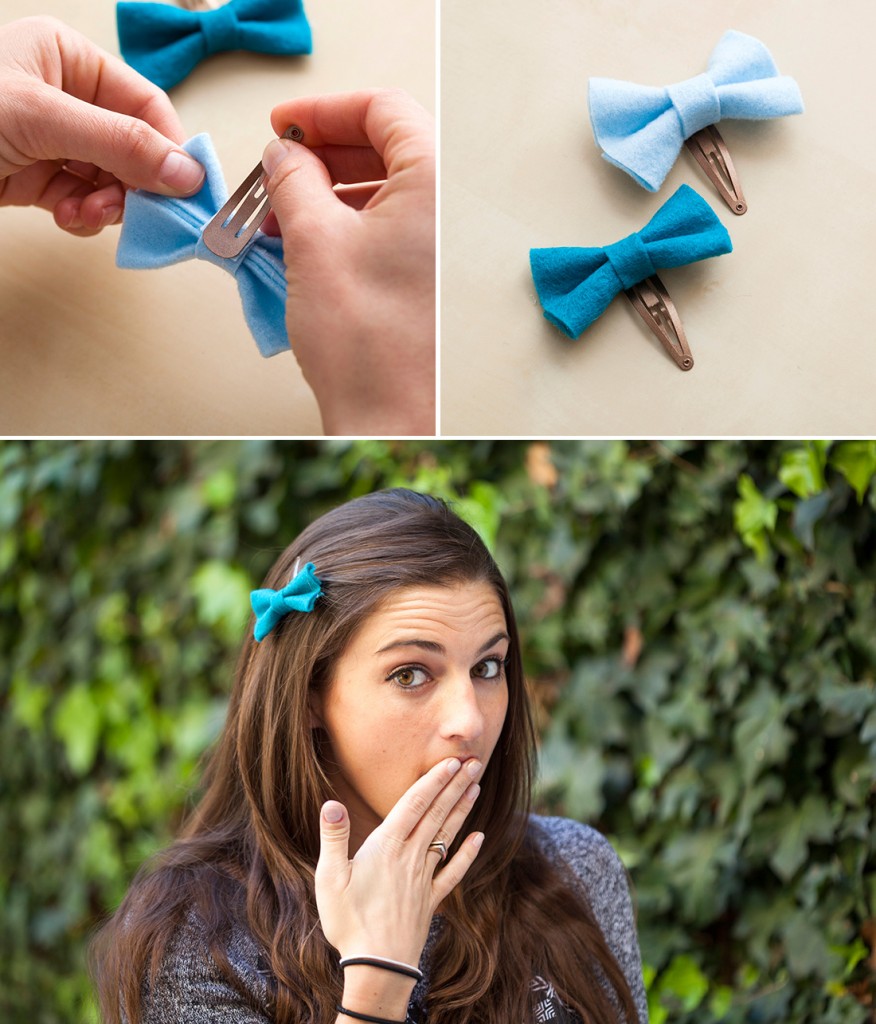
To make small cute felt bows, all you need is a sheet of felt (choose whatever colors you want), glue, glue gun, clips, and the fabric scissors.
Start by cutting a rectangle out of your felt, about 3 inches by 2 inches (to match our size), although you can change the size if you want. But here we are considering that the width will be the length of the bow tie. Next, for the center of the bow, cut a small strip of felt.
Now fold the small sides of the box-shaped felt over so that they meet in the center, then stick the ends with the glue in place.
Further, pinch the middle section of fabric inward to create a bow shape with the folded side facing up.
Then turn the bow over and glue the center after pasting the pinched fabric.
Now add a bit of glue to the back and hold one end of the small center strip to the bow. Then wrap it around the bow and glue in place to stick.
All we mean to say is fold it, pinch it, wrap it and guess what- you’re done! Don’t you think it’s the easiest way to achieve maximum cuteness? Plus, we bet you wouldn’t stop by making one bow you might make many.
To better understand, you can follow the image:
So there you go! Make a new bow every day by using the above tips and tricks. Also, tell us which one is your favorite?
Popular Posts
9 Most Popular Poem on Perseverance
Poems are a way to express feelings in the form of verse. Some poems are written in such a way that tells us where we are and wh...
Augustus Perez
These 13 Paintings Convey Deep Meanings In The Most Extraordinary Way
Pictures speak a thousand words for those who understand its language. But an art that depicts the same is rare to confront. Fre...
Swati Bhandari
Phoenix Bird And Its Popular Culture Adaptations
In Greek mythology, the Phoenix is a creature that resurrects from its ashes after it has ceased to exist in a show of flames. I...
Kevin Green