10 Science Projects That are Easier & More Fun to Do With Kids
Here is the list of a few amazing science experiments that are better than making slime. You won’t believe it, but these projects would teach you a lot about science.
What comes first in your mind when you think about a science project? How to make slime? Well, making slime is the easiest and the coolest project for kids.
Science experiments are always fun. Be it organic chemistry or researching in physics, Science is an interesting subject and also a nightmare. While some try science experiments with kids at home, others do in the lab. Don’t worry if you have never entered into the science lab, some science experiments are easy and would make you learn a variety of science concepts.
If you find science experiments cool, then get ready with your lab coat, as you are going to learn about science experiments that are fun and are better than creating volcanoes at home. But before you get ready to perform these experiments, make sure that you take the help of your mentor or parents.
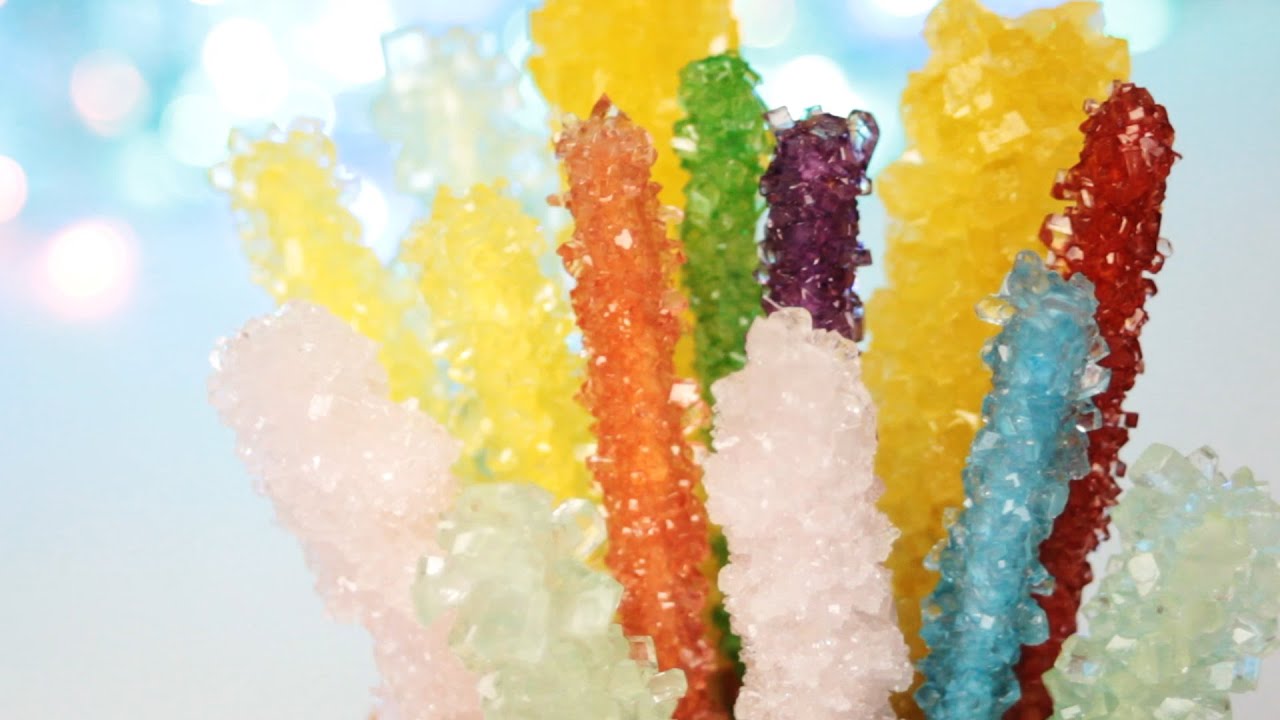
1. Grow Rock Candy in a Glass
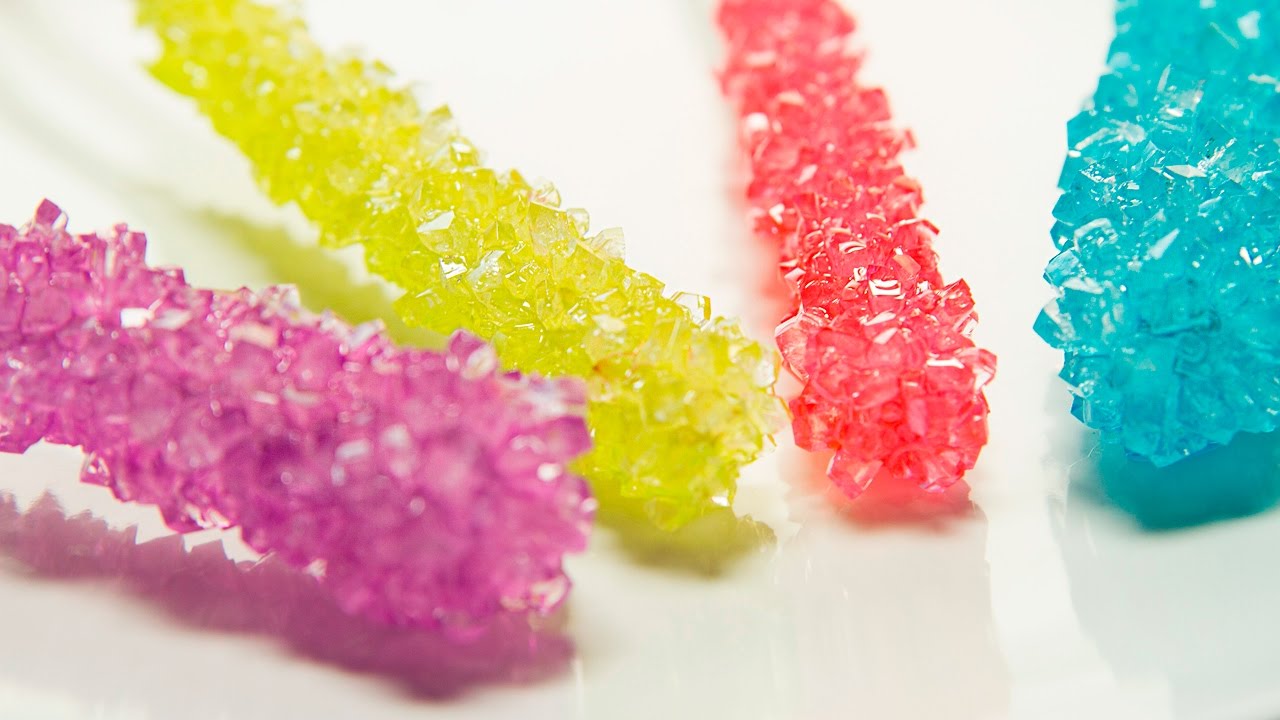
You must have heard about the crystallization process, but have you ever used this concept at home? If not, then use this process to grow rock candy in a glass. Things you will need are sugar, water, wooden sticks, food color dye (optional), and a utensil for boiling.
Steps to Grow Rock Candy:
- Boil two cups of water in a pot, add 4-5 cups of sugar and let it boil until the sugar dissolves. This would create a supersaturated solution.
- Add flavor enhancements if you want to.
- Allow it to cool for half an hour.
- While you wait for the solution to get cool, prepare wooden sticks to grow the rock crystals.
- Take the wooden sticks and roll them in granulated sugar.
- Once the solution has cooled, add food coloring to make rock candy.
- Now put the solution into a jar and add the wooden stick into the center of the jar. If you don’t have a big jar, then transfer the solution into 2-3 jars. But then you would need 2-3 wooden sticks, each for one jar.
- Secure the stick with a pin. Cover the jar with a paper towel.
- Place the jar in a cool place. Every day, you will see rock crystal growing. When it reaches its maximum size, then remove the sheet and place it on a paper to dry before eating.
2. Make Invisible Ink
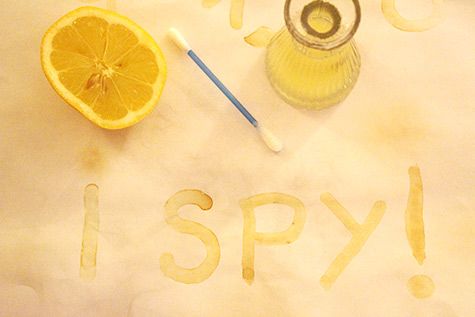
Do you have a secret message to share with someone special or have a password that no one should see? If so, then this science project is worth trying. Know how to make invisible ink and to become a secret agent in no time. You will need lemon, water, bowl, cotton, lamp, and spoon.
Steps to Make Invisible Ink:
- Take a lemon and cut it into two pieces. Squeeze its juice into the bowl.
- Add a few drops of water into it and mix well.
- Take cotton and dip into it. Write a message with a cotton dab on a paper.
- Let it dry for a few minutes.
- It is time to show magic. Show the secret message by heating the paper and holding it close to a light bulb.
You might be wondering how does this happen? Lemon juice is an organic substance and turns brown when it is heated. When you mix lemon juice and water, it is hard to notice its presence. Other than lemon juice, wine, milk, and vinegar work in the same way. It (invisible ink) could also be prepared by using chemical reactions.
3. A Diet Coke and Mentos Eruption
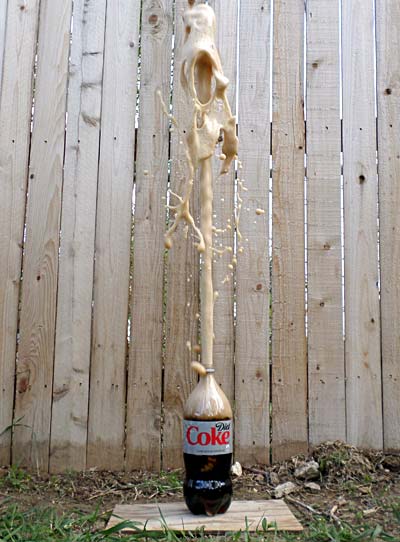
It is one of the most common science experiments in modern times. This project would teach you more about carbon dioxide and surface tension. If you are planning to do this project, make sure you do this outside home, on the lawn or garden.
You will require a large bottle of diet coke, geyser tube (optional), and half a pack of mentos.
Steps on How You Can See the Explosion:
- Keep the diet coke upright and unscrew the lid.
- Insert the funnel into it so that it would be easier to add mentos at the same time.
- It’s time for some fun. Drop the mentos into the funnel and run. If you have dropped the mentos properly, you would see the eruption in a few seconds.
- Capture the eruption and record the observation in a notebook.
The reason is there is a lot of carbon dioxide waiting to escape the liquid in the form of bubbles. When you drop mentos, it speeds up this process by breaking the surface tension of the liquid and allowing bubbles to form on the area of mentos. You can try this experiment with other sodas, but it works best with diet coke as it is not so sticky.
4. Make a Sparkling Volcano
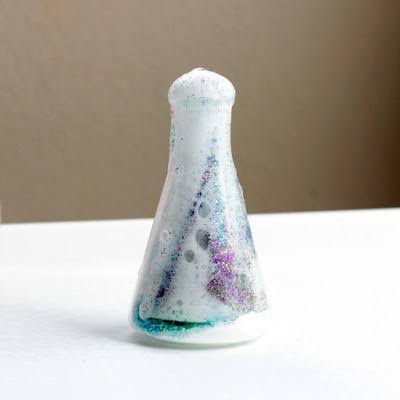
Most of the science projects either explode or sparkle. You can make a sparkling volcano at home in easy steps. You will need baking soda, vinegar, vase, food coloring, glitter.
How to Make Sparkling Volcano With Minimum Expense:
- Take a vase and add 2-3 tbsp of baking soda at the bottom of it.
- Now add glitter and a few drops of food coloring into it.
- Add ½ cup of vinegar into the vase and wait for the explosion and sparkles.
- Repeat the experiment. This time ask your child to add other ingredients like pepper, salt, dish soap. Note what happens when these ingredients are added to the vase.
Enjoy the results! Have you ever seen a beautiful sparkling volcano?
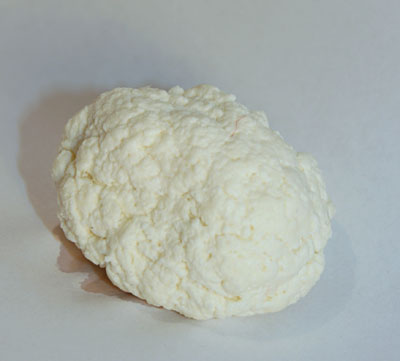
5. Turn Milk Into a Material That Resembles Plastic
You might find this science experiment a little weird, but once you try this, you would know about casein plastic and its properties. Do you know that in the early 1900s, milk was used to make different ornaments, beads, buckles, and buttons? You would be shocked to know that the milk was also used to make Queen’s Mary Jewelry. Know how they use milk to create jewelry with this science project.
You will need a pan, milk, white vinegar, strainer, paper towel, food dye, and glitter.
Steps to Turn Milk Into Plastic:
- Add a cup of milk in a pan and let it boil.
- After the milk gets boiled, turn off the burner.
- Add about 4tbsp of white vinegar into milk and mix it for a minute.
- Pour the mixture on the strainer.
- Pour everything left on the paper towel and pat out the liquid.
- You would be amazed to see that milk is turned into plastic. Press it into the cookie cutter and add glitter. Decorate gifts or make fridge magnets with milk turned into plastic.
This transformation happens when you add vinegar into the milk. It changes the acidity level. When you heat the milk, it speeds up the reaction, and the casein protein in the milk begins to clump together and turn into plastic.
6. Make a Rocket Balloon Car

Do you know how to make a rocket balloon car? If not, then try this science experiment with your kids at home. They would be surprised by your creativity and would also learn interesting things about Newton’s Law of Motion. To perform this science project, you will need scissors, tape, bendy straw, straight pins, marker, and Styrofoam trays/plastic bottle.
Steps to Follow to Make a Rocket Balloon Car:
- Cut four wheels, a rectangle, and four small hub caps from Styrofoam trays.
- Now take the balloon and blow it.
- Tape the opening of it (balloon) around the end of the straw so that no air can escape. You could still inflate it by blowing it into the straw.
- Put tape on the long end of the straw down the rectangle's middle, letting the open tip hanging behind.
- Insert the pins through the center of the hubcaps, then into the wheels and edges of the rectangle.
- Inflate the balloon through a straw and then close the straw by pressing it.
- Yay, you are done. Place the car on the floor and let it go.
When the air leaves the balloon, it pushes the car in the opposite direction. This explains Newton’s Third Law of Motion.
7. Make a Rainbow in a Glass
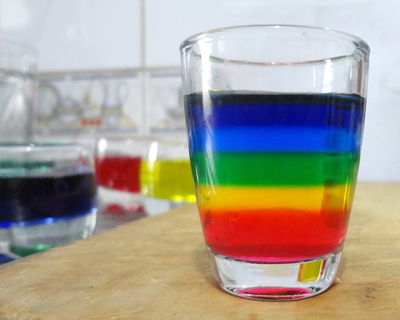
Have you ever tried to make a rainbow at home? Not with crayons on your drawing book but with skittles at home? If not, then try this cool science project with your kids. It is easy and doesn’t take time.
You will need a mug, water, skittles, 6-7 separate cups, and a dropper.
Steps to Make Rainbow in a Glass:
- Take a different amount of skittles in cups (2red, 4blue, 8purple, 10yellow, and more) of your favorite colors.
- Microwave a cup of water for a minute.
- Pour 2-3 tbsp of boiling water in all cups.
- Stir the cups carefully. Now leave the cups to rest for a few minutes. After 5-10 minutes, stir them. Make sure that skittles are dissolved, and the cups are kept at room temperature.
- With a dropper, add these colors into a glass (one by one). Start with your favorite color (you may add colors as you see in a rainbow).
- Make sure that you don’t go fast, as the colors would get mixed.
- Yay, you have made a rainbow.
Skittles are made of sugar. When you add hot water into it, the skittles leave their color, and sugar dissolves. The cup with only 2-3 skittles doesn’t have much sugar than the one with ten skittles. But they have an equal amount of water. The cup with the less sugar would be less dense and would float over the one having more amount of sugar. So, this is how this works.
8. Magic Egg Experiment
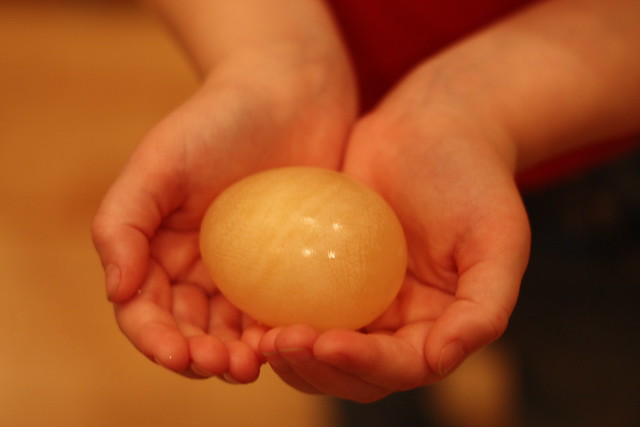
An egg is fragile and gets broken easily. If you knock it hard, then it would get cracked easily. But do you know you could make an egg bounce and that too without breaking? Let’s see how it could be done.
You will need a boiled egg, vinegar, and a glass jar.
What Would You Need to Make an Egg Bounce?
- Take a boiled egg and place it into a glass jar.
- Pour white vinegar into it. Make sure that an egg is fully immersed in it.
- Now close the jar tightly.
- Keep the jar away from sunlight. You can keep the jar in your room.
- Observe what happens to the egg the next day.
- If you see bubbles forming around the egg, it is fine. After some time, you will notice that the egg would start to float due to bubbles.
- The shell of the egg then would start to decompose due to vinegar.
- Leave the jar as it is for a week and then drain the vinegar from the jar. You would notice that eggshell is decomposed completely.
- Take the egg out and feel its texture. Now try to bounce the egg. Did it bounce? Of course.
- Rinse the egg in water and let it dry.
This is one of the interesting science projects I have ever seen. It explains the term osmosis. When a liquid from a lower concentration solution moves to a more concentrated solution through a semi-permeable substance, it is termed as Oasis. In the project, vinegar diffuses through the eggshell and leaves it leathery in texture.
As the shell gets breaks, CO2 is produced, which you see in the form of bubbles. It leaves the egg immersed in the vinegar and cause the shell to dissolve it completely.
9. Ice Cube Magic - Cut Ice Into Half
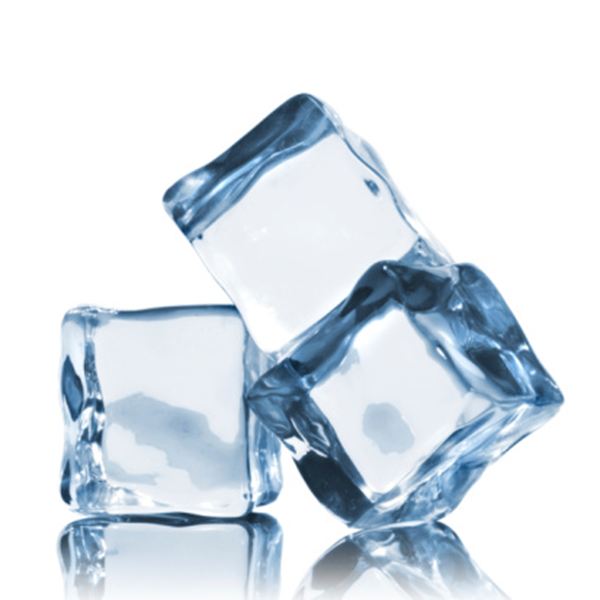
Cut a piece of ice into half and understand the process related to ice skating. You will need an ice cube, a tray so that things don’t get wet, a container, and a fishing line with a weight on each side.
How Could You Break a Piece of Ice Cube?
- Take the container and put it upside down on the tray.
- Put the ice cube on top of the container.
- Place the fishing line over the ice cube in a way that weights are left dangling on the side of the container.
- Wait for 5-7 minutes.
- You would see an ice cube breaking into two pieces.
The pressure of the weights pull the string through the ice cubes and melts the ice under the fishing line. This process also works when you do ice skating, where the blades of the skates melt the ice directly. This allows the skater to move smoothly on the layer of the water.
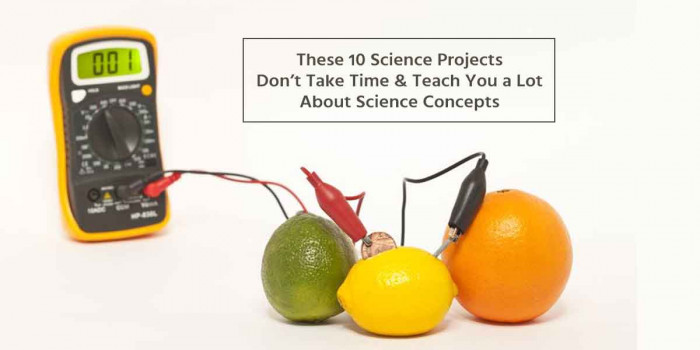
10. Fruit Battery Experiment
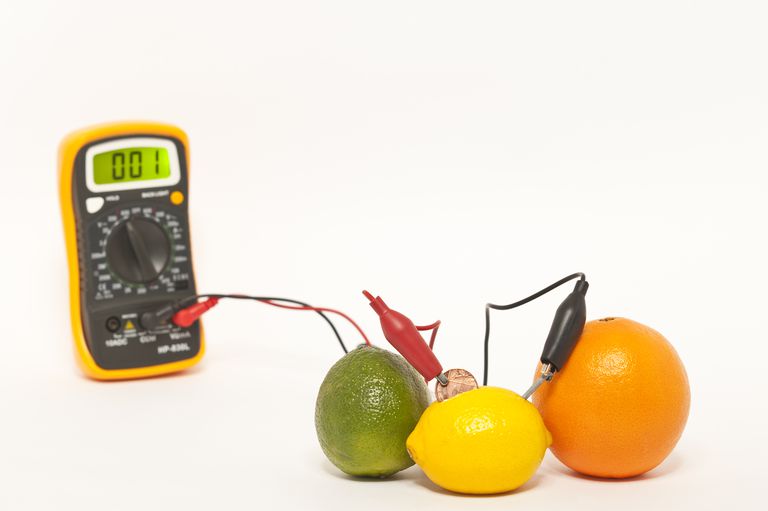
Have you ever imagined of creating a battery with a fruit? Sounds weird? But today, we would make a fruit battery that would light a bulb too! You will need a citrus fruit (orange, lime or any other fruit), copper nails, small light bulb, zinc nail, microammeter (optional), and electrical tape.
Steps to Make a Fruit Battery:
- Take a citrus fruit and squeeze it. Remember that you have to soften the fruit.
- With the help of nails, puncture the citrus fruit. Insert the nails about 2-3 inches away from each other.
- Now it is time to prepare the bulb. Take the bulb and peel off its plastic insulation. Wrap the wires around the head of the nails. You can use tape to tighten the end of the wires.
- Now attach the wires to the copper nail, and the bulb will light up.
Do you want to know how does this happen? The citrus fruit has acidic content and is good for conducting electricity. The fruit contains charged ions. When you insert nails into the fruit, the electrons start moving from fruit to the nail and leave the protons in the fruit. The transfer of electrons and when you attach nails generates electricity.
Final Words
No matter whether you are making slime or rocket balloon cars, every science experiment teaches you something new and even things that you might not have read in school books.
Have you tried these science projects at home? Do you know other science projects that could be performed with kids? If so, then share ideas with us.
Popular Posts
What Is Trypophobia – A Disgust More Than Fear
"I can't really face small, irregularly or asymmetrically placed holes, they make me like, throw up in my mouth, cry a little bi...
Chandan Roy
16 Interesting Facts About Ambidextrous People
A lefty or left-handed uses his left hand more naturally and dominantly than the right hand. And the righty or right-handed is o...
Ethan Stephans
20 Interesting Facts About Meteoroid, Meteor and Meteorite
Watching celestial objects is a true delight. It is still fun to catch a sight of shooting stars when we grow up. A second of th...
Swati Bhandari